Supporting Attachments
Use Cases
- Script for a video or webinar that needs to be approved or seen by other content creators.
- Upload the creative brief for a project for visibility.
- Upload supporting images to help the design process.
Use Cases in Gallery
- Upload templates for sales teams to leverage and customize associated content plans.
- Include reference material to broader internal teams to encourage alignment.
- Share design asset files so you can have assets printed.
Folders vs Standalone Attachments
Supporting Attachments offers folder and standalone attachment options to help organize and access attachments more efficiently. Users can create folders and upload attachments within them, or add standalone attachments that are not part of any folder.
Tip: Users can also upload attachments to folders created by admins for a specific content type. To learn more about creating folders in content type settings, refer to Content Types and Workflow Settings.
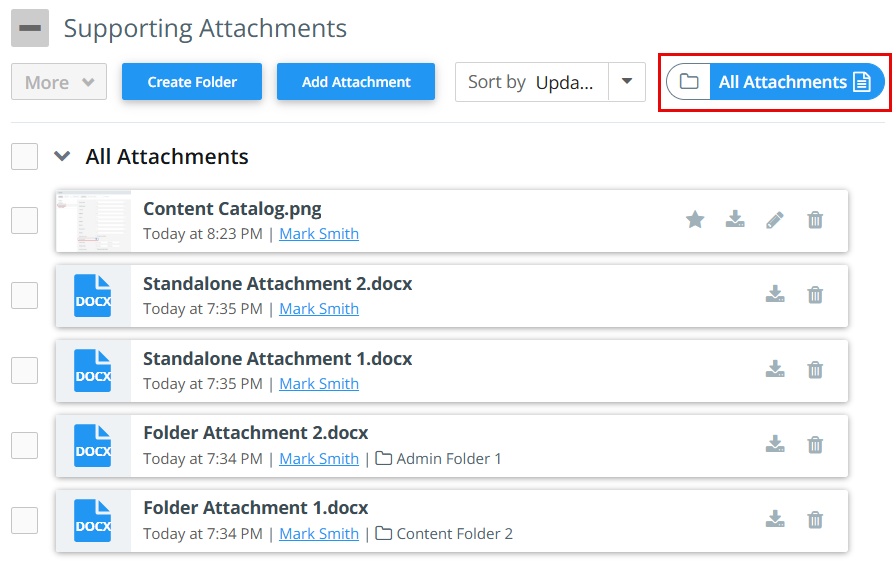
Two viewing modes are available:
-
Folder View – Displays folders in the Folders section along with the number of attachments contained within each folder. Standalone attachments appear in a separate Standalone Attachments section.

-
All Attachments View – Lists all attachments in a single view, independent of folder organization. Attachments within folders show the corresponding folder name.
Note:
-
In any view, folders and attachments are sorted by default based on the Updated date: Newest. Users can use the Sort by drop-down to sort the folders and attachments as needed.
-
Users can manage folders from the Content Details page, including viewing, editing, deleting, downloading folders, and uploading attachments within them.
-
Only folders created in the Content Details page can be edited or deleted. Folders originating from the Content Type cannot be updated or deleted within the Content Details page.
-
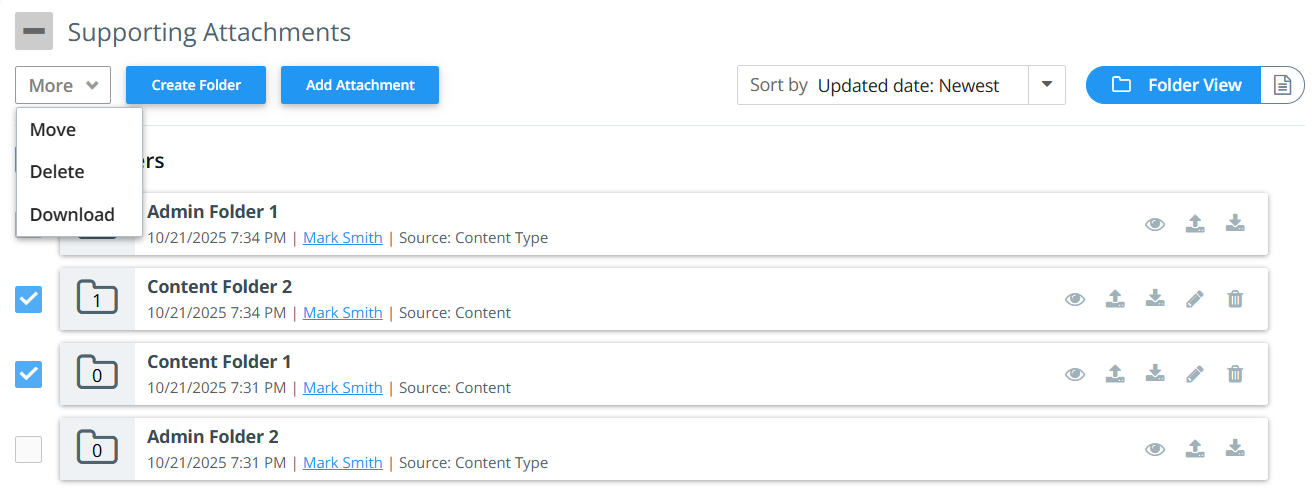
Users can move attachments, whether from a folder or standalone, using the More drop-down. Attachments can be moved to another folder or made standalone.
Creating a Folder
To create a folder or add an attachment:
-
Go to the content details page of the content you want to create a folder or add an attachment to.
-
In the Supporting Attachments section, click Create Folder.
-
Enter the name of the folder and click Add.

You can create up to 5 folders only. This will appear under the Folders section.
-
To add a standalone attachment, click Add Attachment and upload the desired file. The file will appear in the Standalone Attachments section.
Viewing a Folder
To view attachments within a folder, click the ![]() icon. A pop-up will display all attachments, allowing you to upload attachments, edit, download, or delete the folder. Attachments can also be downloaded, moved, or deleted individually or in bulk.
icon. A pop-up will display all attachments, allowing you to upload attachments, edit, download, or delete the folder. Attachments can also be downloaded, moved, or deleted individually or in bulk.
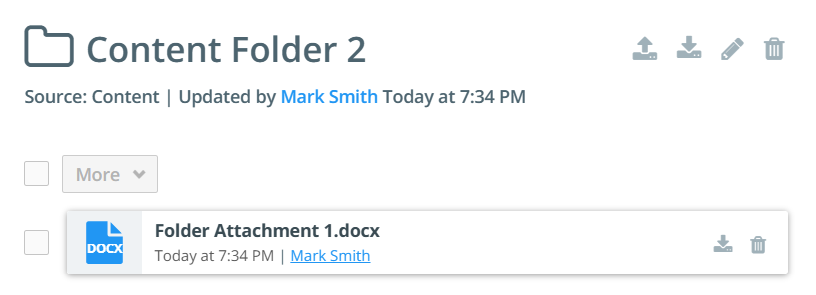
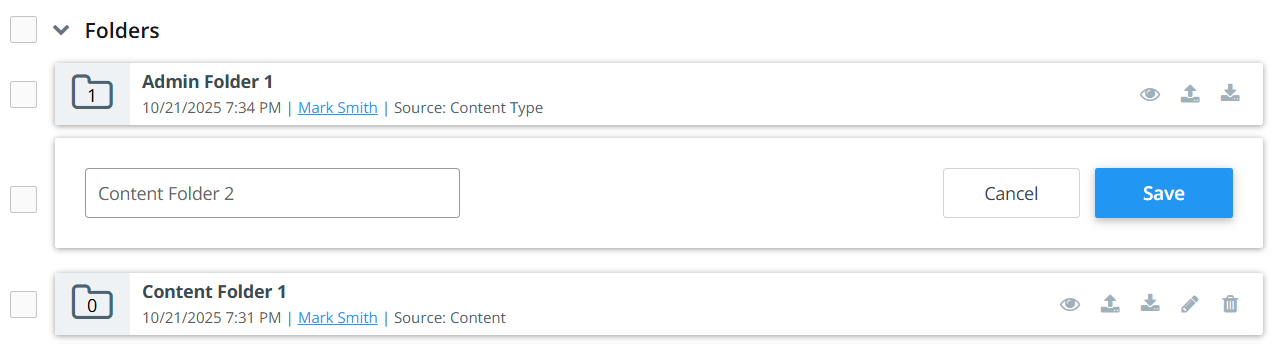
Note: The source of a folder is displayed as Content for folders created on the Content Details page, and as Content Type for folders created by admins in Content Types and Workflow Settings.
Editing a Folder
To edit a folder:
-
Locate the folder you want to edit in the Supporting Attachments section.
-
Click the
 icon to edit the folder.
 -
Update the folder name.
-
Click Save.
Moving a Folder/Attachment
To move a folder or an attachment:
-
In the Supporting Attachments section, select the checkboxes of the folders and/or attachments that you want to move.
-
From the More drop-down, click Move.
-
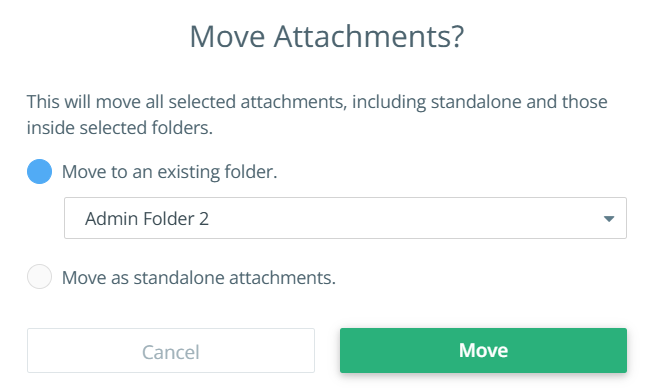
In the pop-up, select one of the following options:
-
Move to an existing folder - Select a folder from the drop-down to which the attachments will be moved.
Note: The drop-down displays all other folders available within the content’s supporting attachments.
-
Move as standalone attachments.
-
-
Click Save.
Note: Standalone attachments can be dragged and dropped into any folder to move them.
Deleting a Folder
To delete a folder:
-
Locate the folder you want to delete in the Supporting Attachments section.
-
Click the
 icon to delete the folder.
 -
In the pop-up, select one of the following options:
-
Move existing files to another folder - Select a folder from the drop-down to which the attachments will be moved.
Note: The drop-down displays all other folders available within the content’s supporting attachments.
-
Move existing files outside the folder as standalone attachments.
-
Delete folder and all attachments within.

-
-
Select the checkbox The changes cannot be undone.
-
Click Delete.
Other details included in supporting attachments
- Image thumbnail
- Title of file
- Time of upload
- User who uploaded the attachment
- Sort by alphabetical order, updated date, or created date
- Bulk move, delete, and download option using More button
Note: Supporting Attachments feature is available in the Initiatives, Ideas, and About page setting as well. Folders are supported only in content. Elsewhere in Kapost, attachments appear as a flat list without folders.
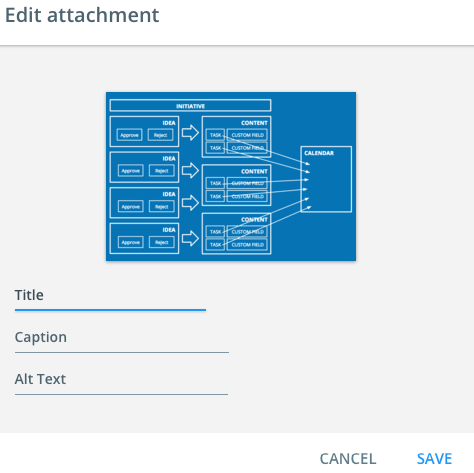
Images can all be uploaded as supporting attachments for blogs and can be specified as featured images. The title and caption text can be specified by clicking the edit icon. Image details can be edited and would display next to the image in a published blog post.
Managing Supporting Attachments
Now, teams can download supporting attachments from the Gallery. Most document and image files are accepted. Refer to the Supported File Types section to see a complete list of files supported. Supporting Attachments will be available in Salesforce and anywhere you have embedded the Gallery.
Add Attachments to Gallery from Studio
Attachments that are listed in the Manage Attachments section may be shared as a supporting attachment. If an attachment is deleted from the supporting attachments section, it will not appear in the gallery list.
- Navigate to the Studio > Content.
- After selecting content from the list, scroll down to the bottom and expand the Gallery.
- Select the Add to Gallery button.
- Select Manage attachments or Add attachments.
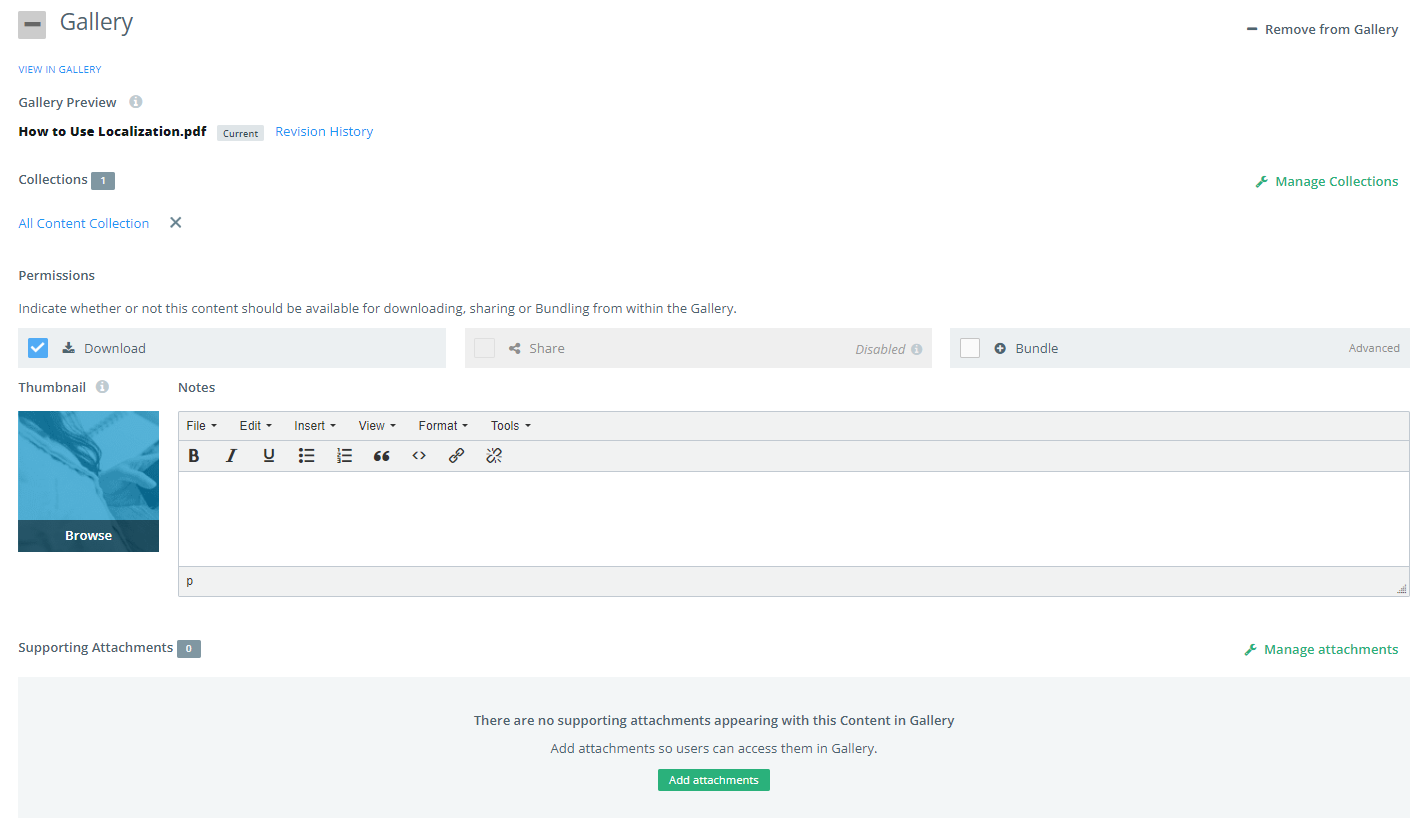
- From the Manage Attachments pop-up, select the attachment from the drop-down you would like to include and select Update. Attachments will appear in the list inside the gallery section of the content. The drop-down allows for selecting multiple attachments. Select Manage Attachments to make any changes after added.

Note: If there are no supporting attachments available to be added to the content, you will not be able to select Manage attachments.
View and Download Attachments
Once attachments have been added to Gallery, they can be viewed in the attachments tab on the specified content in Gallery. Right after you add an attachment, you can select the link "view in the gallery" or navigate to the content in the gallery.
Note: Users must be logged into Kapost to see the attachments tab.
If you view an attachment in the gallery and want to make changes to that attachment, select the "Edit in Studio" button in the top right corner of the gallery window.
Single file attachments can be downloaded or all can be downloaded at one time as a zip file.

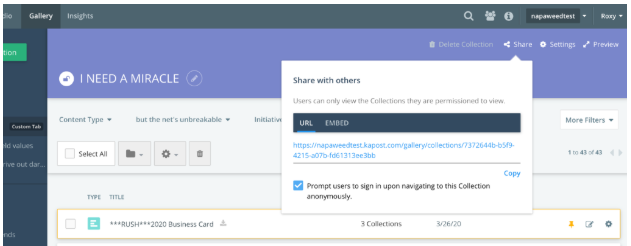
Manage Access
You will be able to view any attachment you have permissions to view. Admin users can change permissions using the Manage Access section on the right side of the content screen.
Permissions must be turned on in order for admins/editors to share content.